
I remember my first time pretending to be a taxi cab driver was in GTA III where you could
steal a taxicab and then complete side quests by shuffling clients to where they want to go and get honestly paid for it. I actually tried to obey traffic signals, drive at the correct speed limit, and avoid running over the occasional prostitute – it was actually fun driving people around! Fast forward a decade and here I am doing it in person and getting paid real money for it! For those that have been living like the Flinstones, Uber is an app that hails itself as “Your Own Personal Driver” and gives the user the ability to call a “cab” from anywhere as long as they have an internet connection. I actually first heard of Uber on the Dave Ramsey Show and decided to check it out as a way to make additional income however it was banned in Portland until only a month ago. I have 3 nights and 19 trips under my belt so far and I always gets constantly asked what it’s like driving for Uber therefore I figured I would write a post about it! It is a fairly new thing in Portland however people have been embracing it around the globe and all my riders LOVE Uber. My favorite part is that it helps keep drunk people off the road – 95% of the people I’ve driven have been slightly to severely intoxicated and I’m very glad they decided to take an Uber ride rather than getting behind the wheel. Let’s get started!
Becoming an Uber Driver
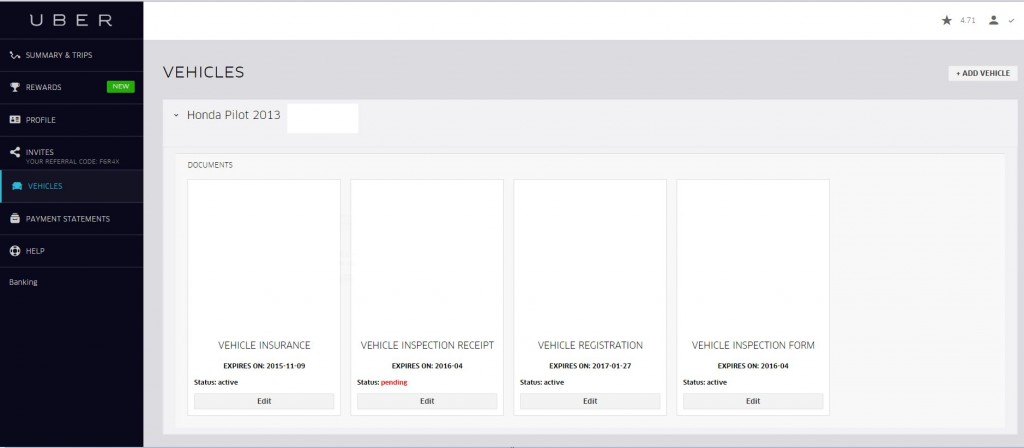
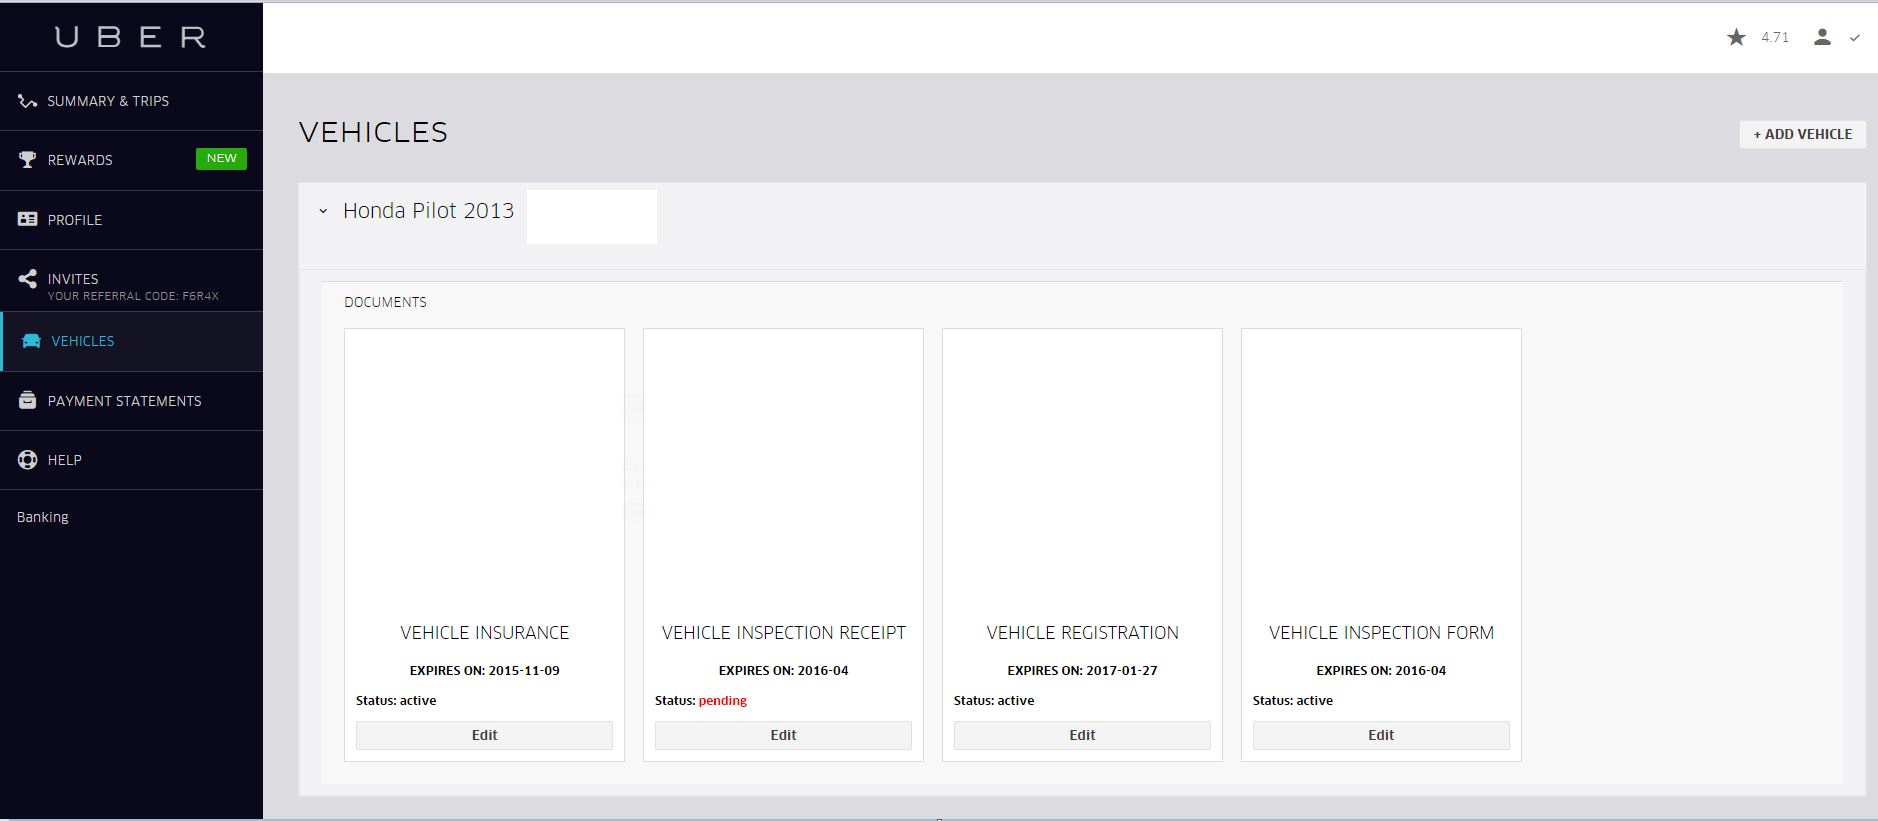
The application process is fairly straight forward and what you would expect from a company founded and ran by Millennials – we don’t have time for bullshit and fluff, we like things simple and to the point. From the Uber login page you select that you want to register as a driver and then fill out your typical personal information along with adding your vehicle. The following are required documents you need to upload:
1. Vehicle Insurance
You must be one of the “named insured” on the policy or Uber will not accept your document.
2. Vehicle Registration
Your vehicle has to be 2005 or newer with 4 doors.
3. Vehicle Inspection Form
The inspection form can be completed on your own time at a participating mechanic – Uber has locations on their website and the cost is around $20. They also host free vehicle inspection events and that’s where I got mine however it was in Vancouver and I had to wait 1 hour for it to get completed but I heard the wait was 2-3 hours at the Portland one!!
Here is a screen shot of the Uber Driver home page:
 Uber will also run a background check and you can request to be cc’d on the documents (which I did) to see what the cops are saying about you! The check includes driving history along with a criminal scan. They’ll also put a small deposit into your checking account to validate it for direct deposit – mine was a $0.01 deposit. The background check will take 5-7 business days while the document review usually takes 24 hours. The whole process itself took 3 weeks for me with the most difficult part being getting the vehicle inspection completed around my work schedule. Once Uber checks that you’re all good to go they’ll send you a link to download the Uber Partner app and activate your account.
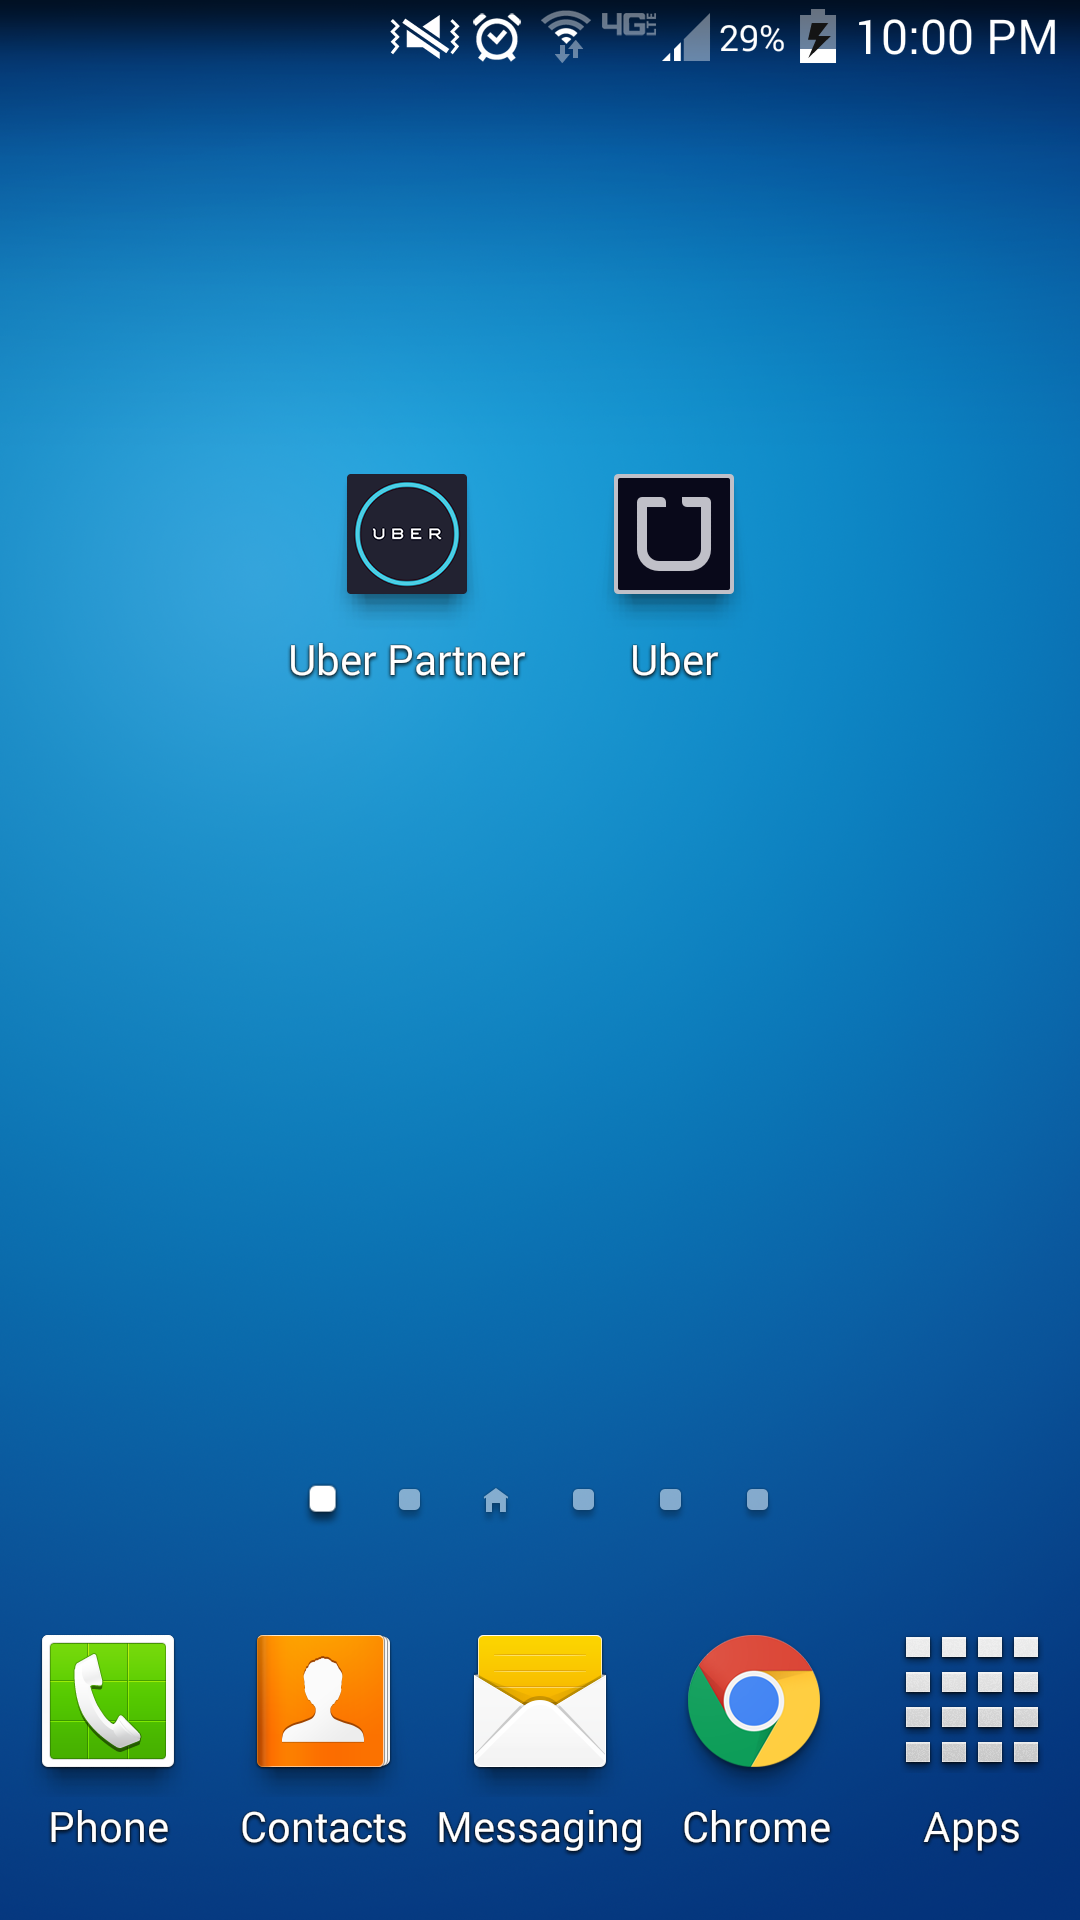
Here is a screen shot of the Uber Partner app vs the regular Uber app:
Using the Uber Partner App
The app is extremely straightforward, any dummy can use it! This is what it’ll look like when you first log-in:
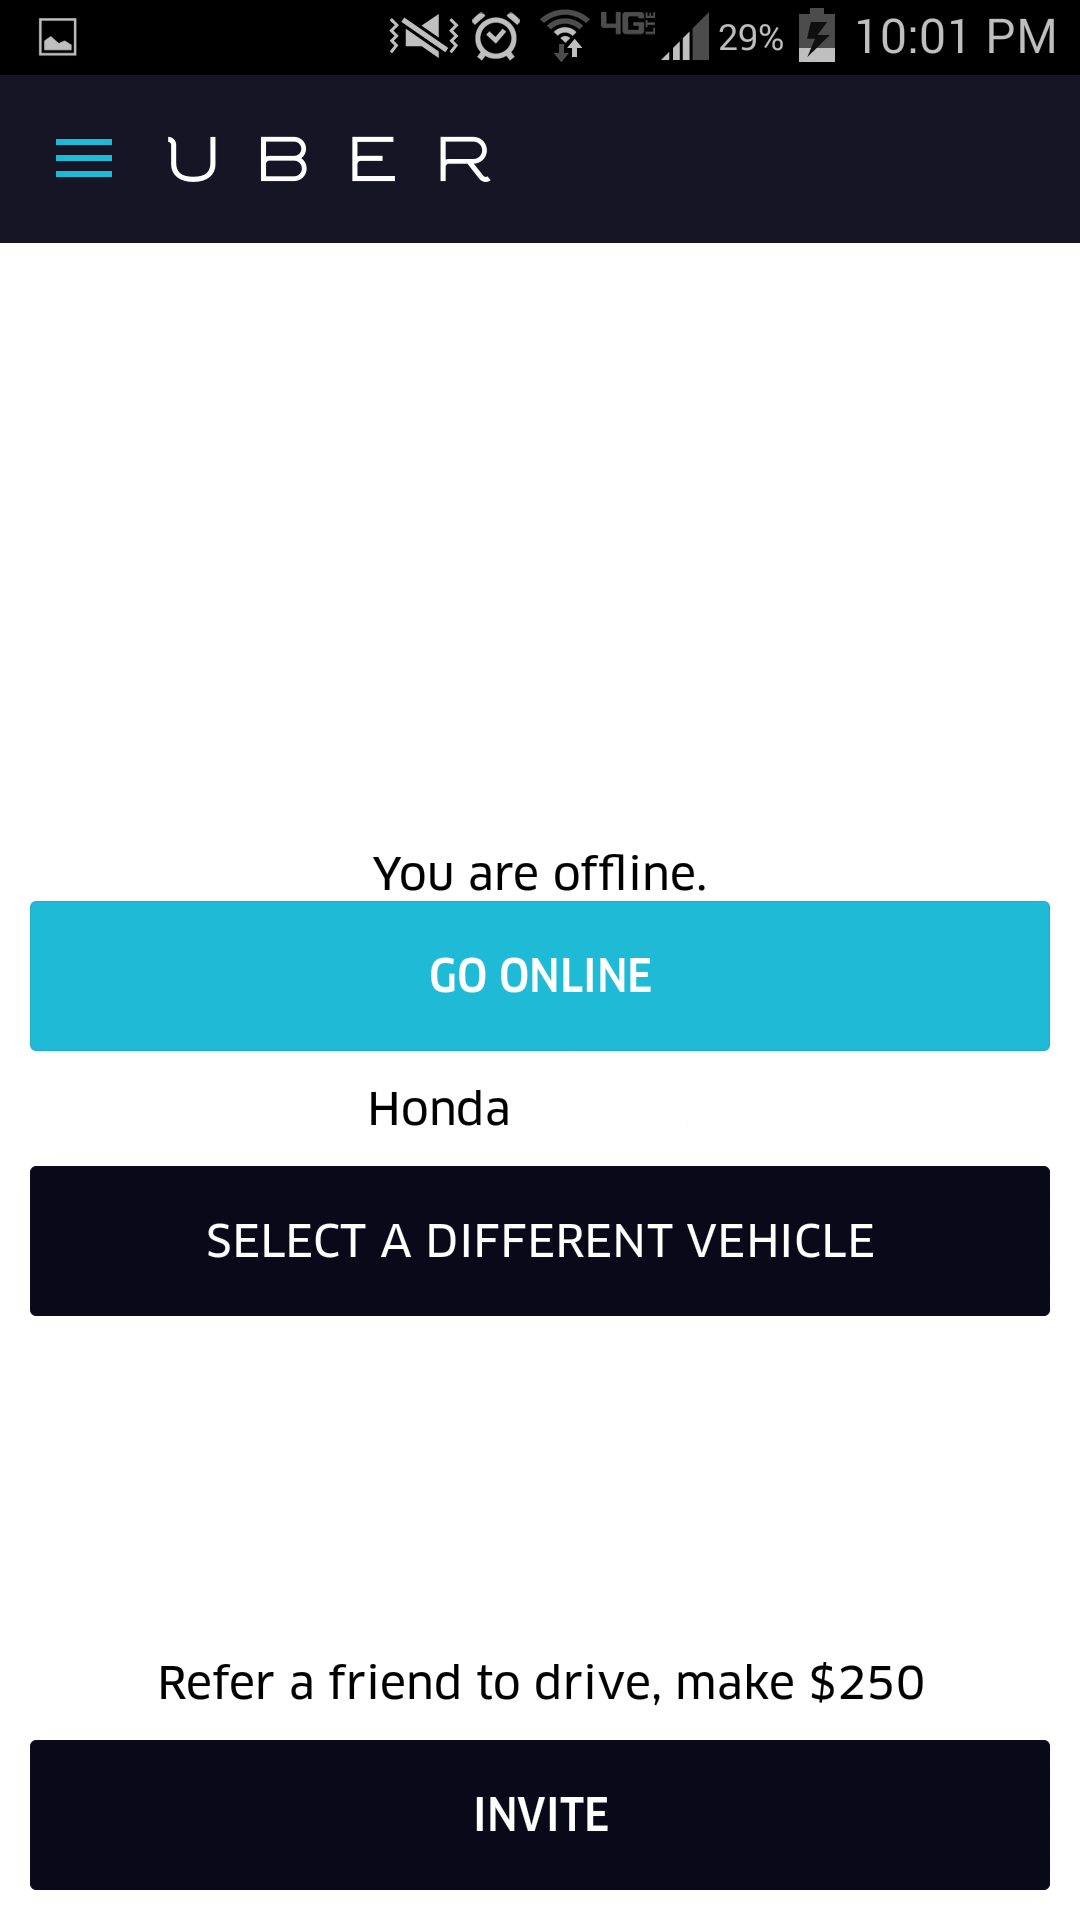
Then you just click “Go Online” and you are officially an Uber Driver! As you drive around to more populated areas you’ll get a “fare” and will have 15 seconds to accept or decline the fare. The screen will give you the location of the person, estimated time to get to their location, and the rating they’ve received from other Uber drivers – it does not provide you with where the person wants to go or what the fare estimate is. There is also no decline button, you just have to wait till the 15 seconds has ended however clicking anywhere on your screen means you’ve accepted the ride. Here is what it looks like when you’re “online”:

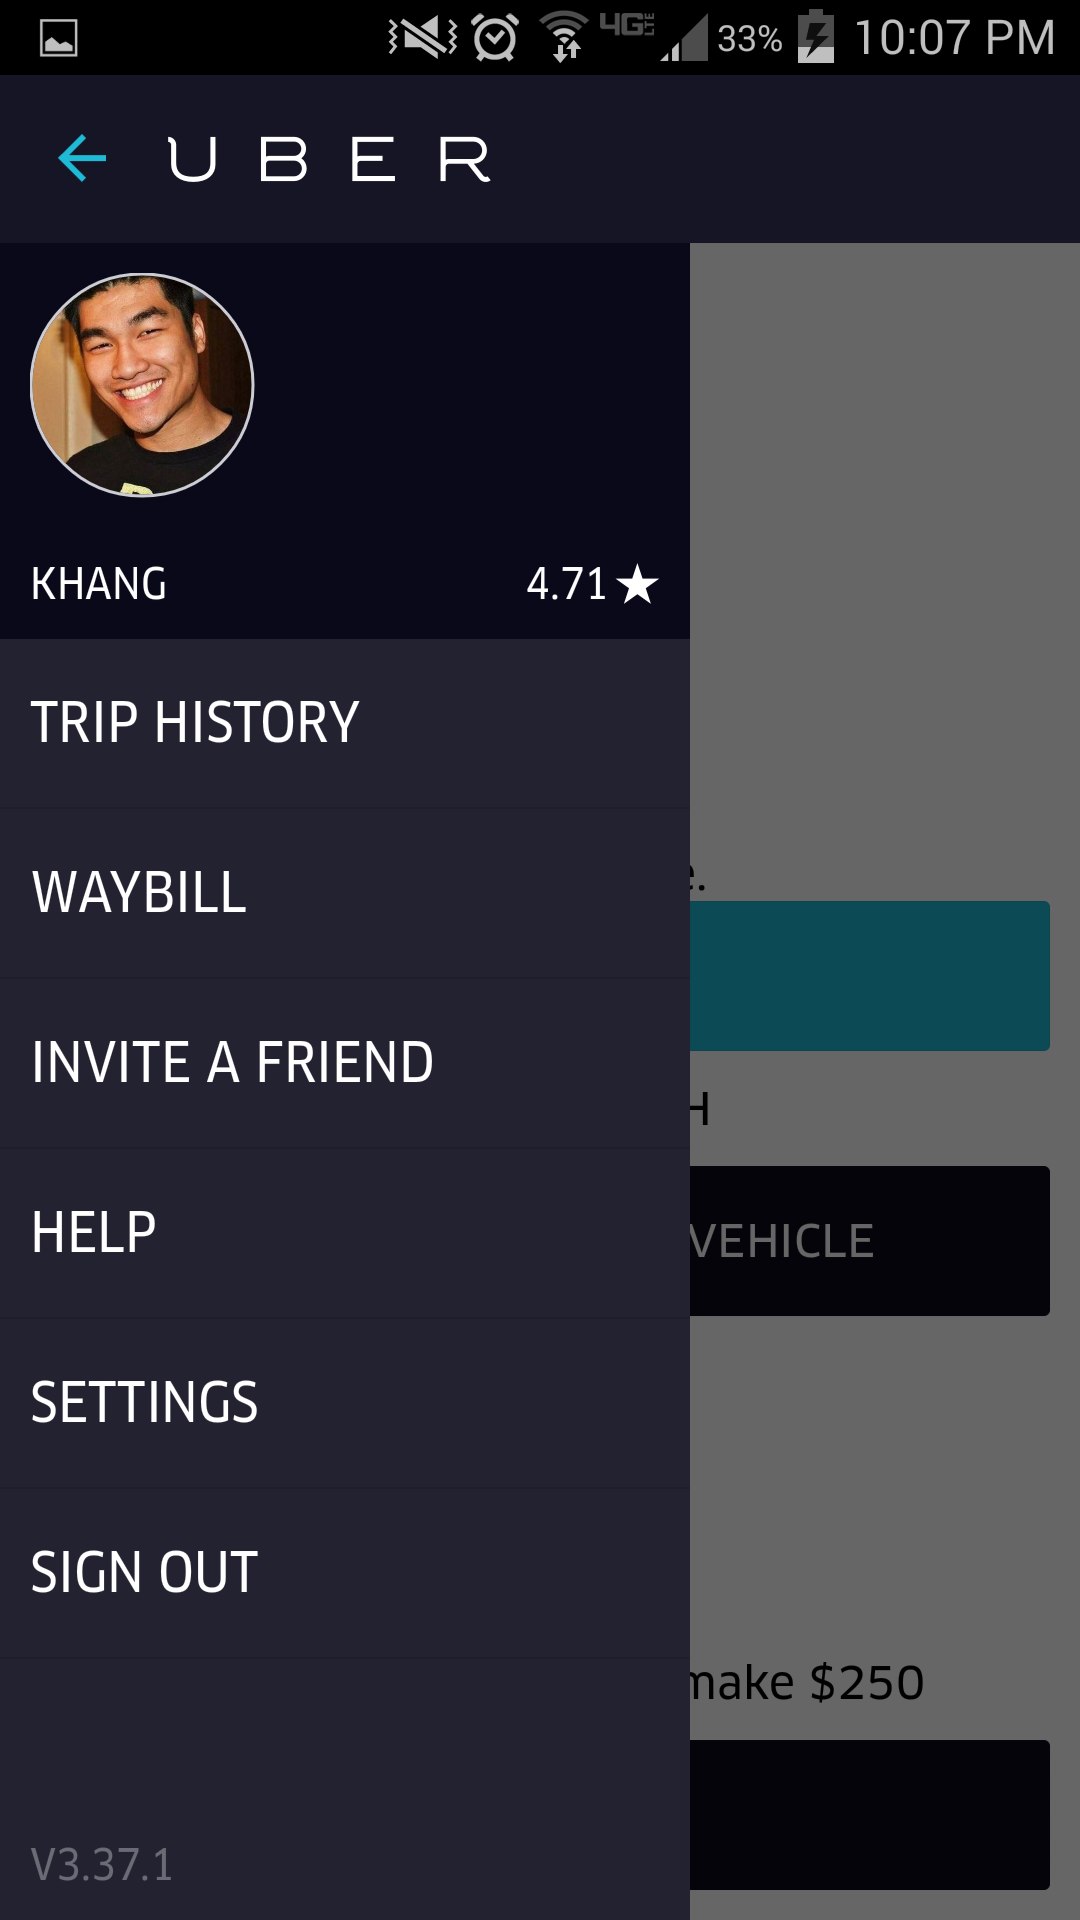
Once you go off-line, there is an options menu in the left hand corner that provides you with other pages that includes your trip history, waybill, invite a friend code, help, settings, and a sign-out button. The waybill is basically a detailed history of your last trip that includes your fare, your passenger, where you picked them up, where you dropped them off, and insurance information.
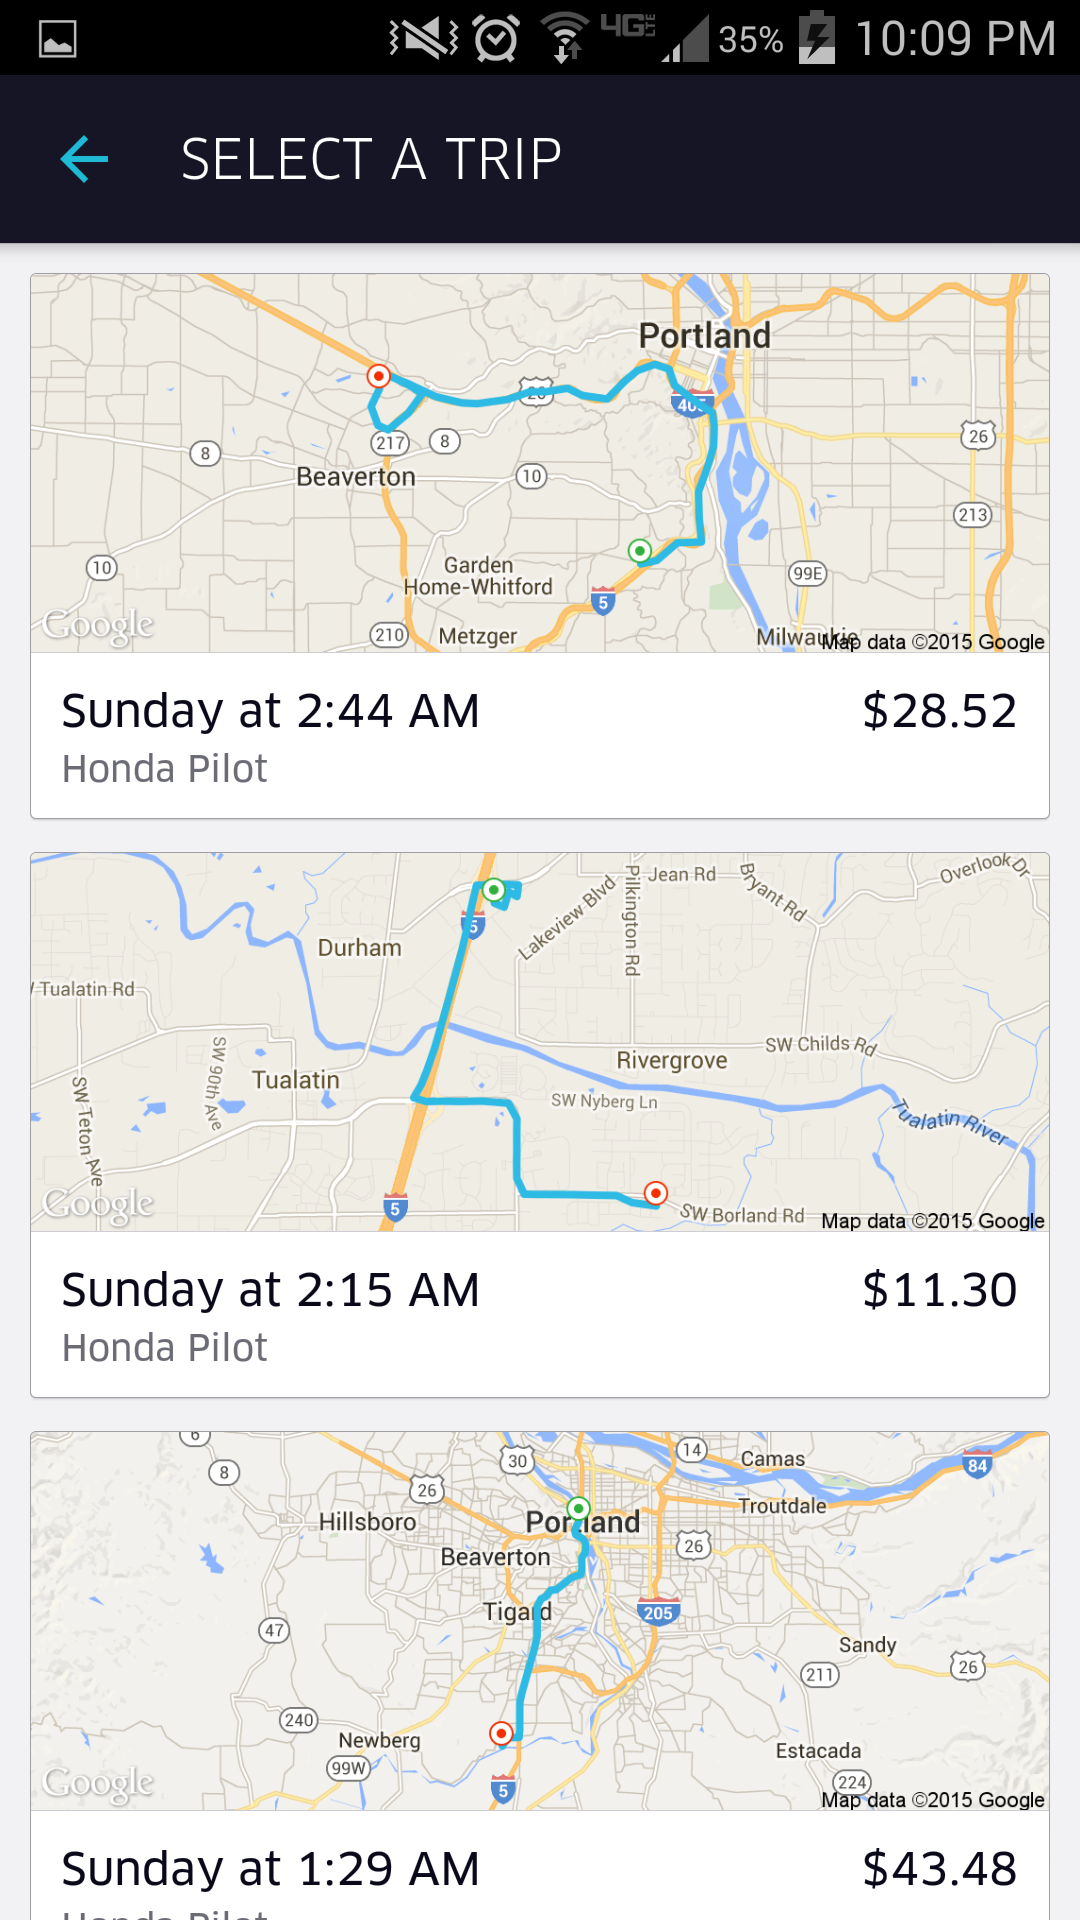
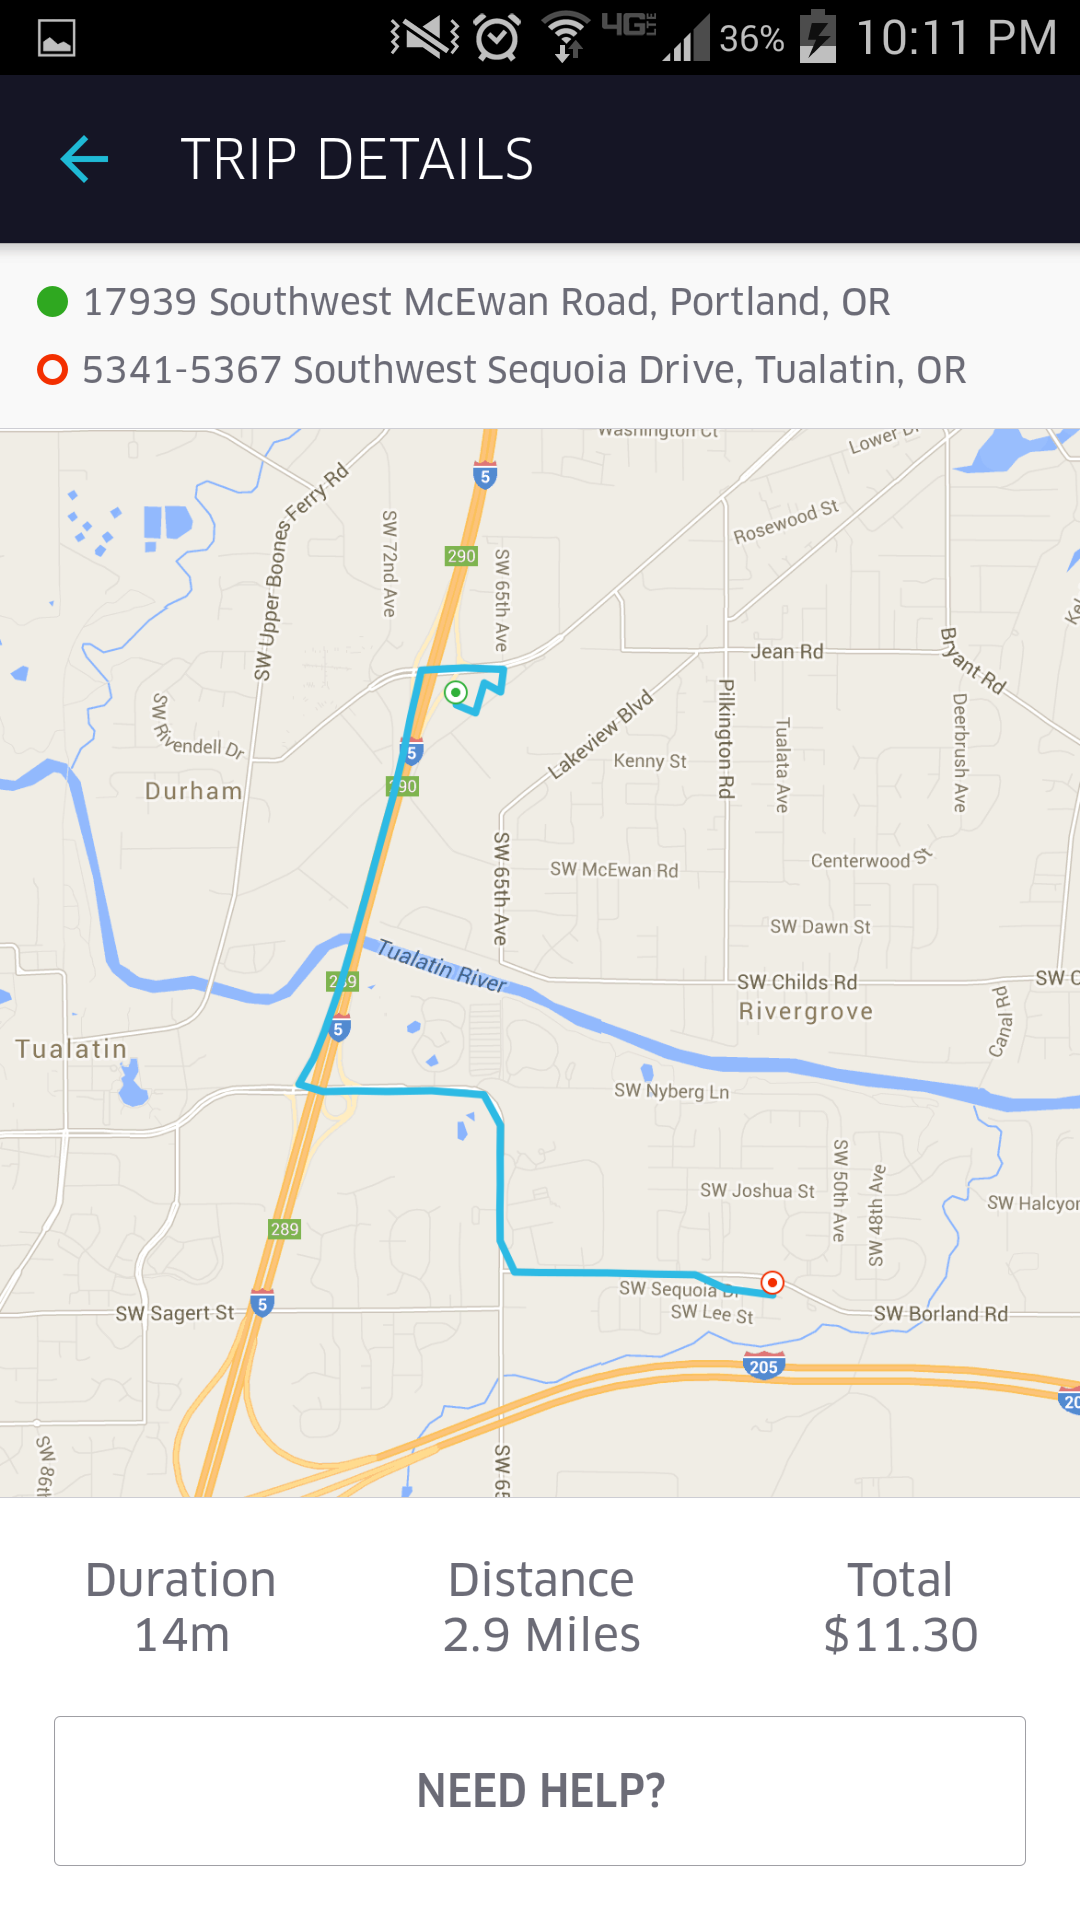
The trip history is the fun part out of all these buttons! It lists all the rides you have completed and shows the route you’ve taken to complete the ride along with the fare that you earned. Clicking on each map will give you additional details like exact pick up and drop-off, duration, distance, and total fare.
When you’re done driving for the night/day, just click “Go Offline” and you back to being a regular citizen.
Actually “Driving” for Uber
Once you accept your first fair they’ll provide you with a location for your rider and give you the option to navigate to their location. Once you click on the navigate button it’ll switch you over to Google Maps and give you directions to their location. Uber also requires that you have a hands-free mount and will reimburse you up to $10 for the device. Furthermore, if you don’t have a smartphone to run the app, you can rent a iPhone from Uber for $10/month but the phone is locked where the only thing you can do is run the Uber app.
Once you get to the designated location you’ll click “Arrived” and your rider will be notified of your arrival. There is also a number provided for you to text/call your rider to let them know where they can find you or to check in on them if you don’t see them. The number isn’t their personal number but acts like an escrow account where you call the generic number and it’ll relay the message to them kinda like Craigslist’s anonymous system. Once you see your client, be sure to ask “Can I please get your name?” to ensure that it’s the correct person you’re suppose to pick-up. I actually had a guy try to steal some other dude’s Uber. The guy said “Are you my Uber?” and started opening the door and I said, “What’s your name?” and he responded with “Uhhhh, Joel?” so I go, “Sorry buddy, maybe next time, good-bye bitch!” but without the bitch part.
The most important part of the ride is making sure you click begin trip when your passengers get in the car and end trip when the ride is complete – this is how you get PAID after all! Once you end the ride, you’ll be given the opportunity to rate your rider from 1 to 5 stars and they’ll have the ability to do the same for you. The rating is actually quite important as you I’ve heard you need to maintain above a 4.7 or else Uber will deactivate your account.
Getting Paid!!
Of course the most frequent question is “How much do you get paid?!?!”
The Rate: $1.50 Base fare + $0.30 per minute plus $1.55 per mile
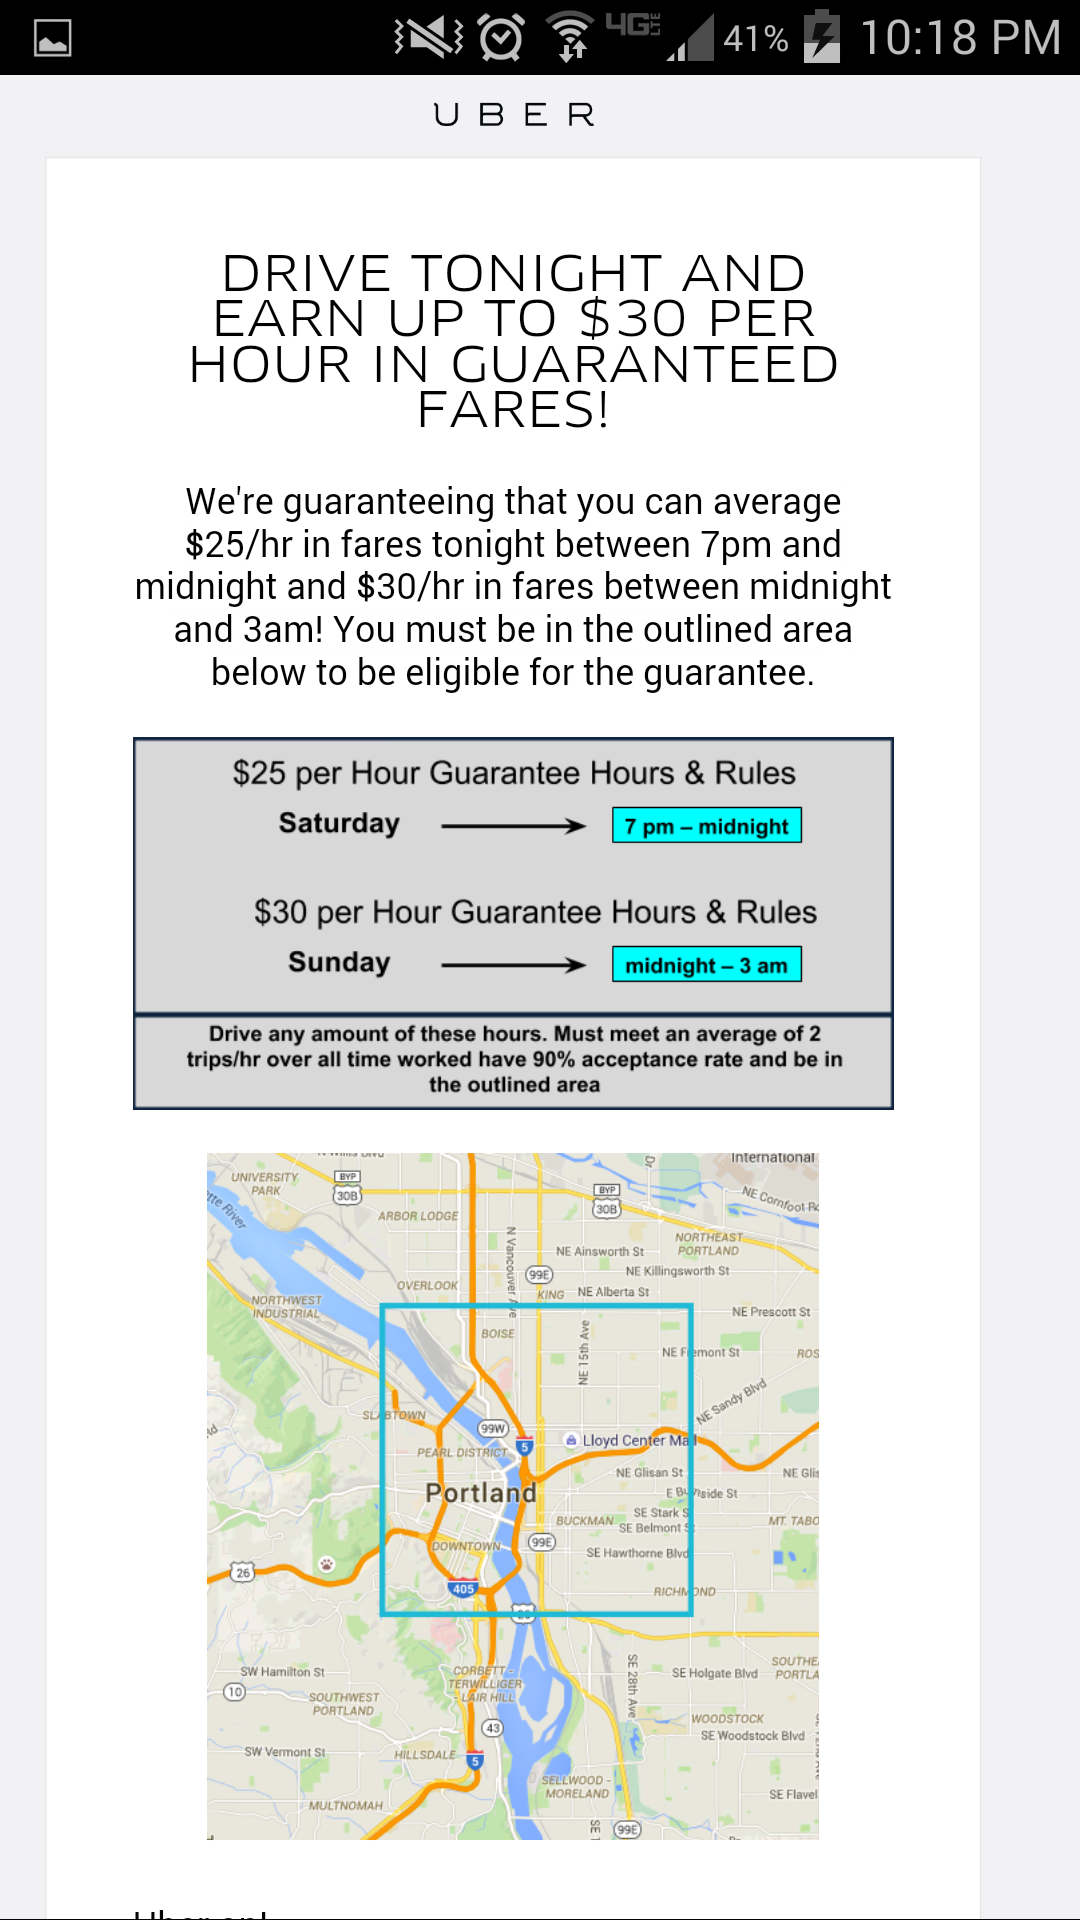
Uber also has additional incentives like where they’ll guarantee you’ll make $25/hr during busy times but you’ll have to meet certain requirements like a minimum of 2 trips and a 90% acceptance rate. Here’s what I mean:
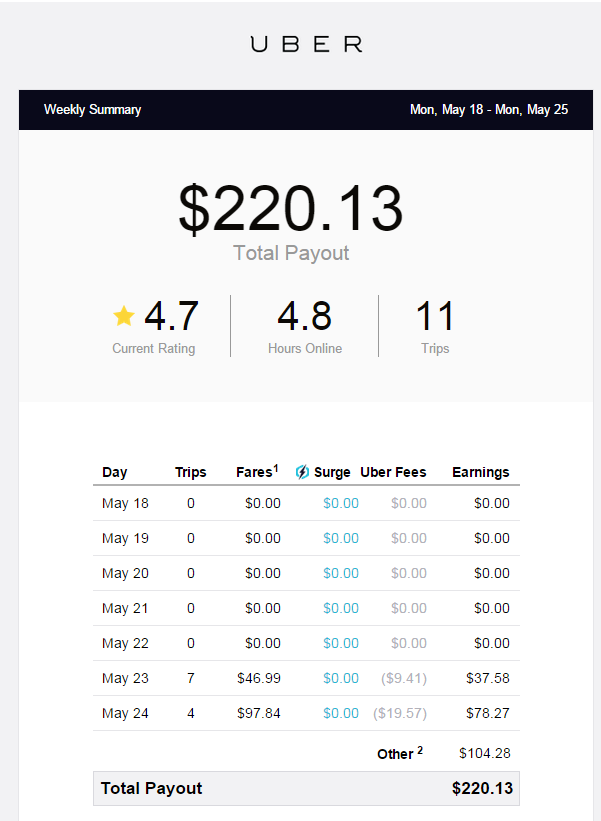
The work week ends on Monday at 4 AM Pacific Time and you’ll get paid on Thursday. Your pay stubs are easily accessible online and they are very clear and concise. At the end of the day, Uber takes 20% of your fares. Here’s one of my pay statements:
Driving for Uber has been a very fun experience so far and I’ve learned a lot more about the surrounding Portland area. It’s also greatly increased my knowledge of the streets and roads and fastest ways to get on a highway. I have no complaints so far and it truly is a perfect part-time job; wear whatever you want, work whenever you want, and the work itself is relaxing and stress-free. If you’re interested in becoming an Uber driver, don’t hesitate to contact me and use my referral code!!!
 The website itself is very beautiful and easy to navigate as you can see below. Categories are very cleanly separated with a distinguished tab to help you differentiate between your budget items; the initial category is your income where your budget should start and the default categories are giving, savings, housing, transportation, food, lifestyle, insurance & tax, and lastly your debt. These categories then have smaller sub-categories where you can add your own custom budget line item. An extra item they have on the side is the “Baby Steps” which is Dave Ramsey’s steps to becoming financially wealthy and I think it’s a nice touch but seems a little weird to me that it’s included in the tool – but it’s his budgeting tool so how could he not sneak it in there??
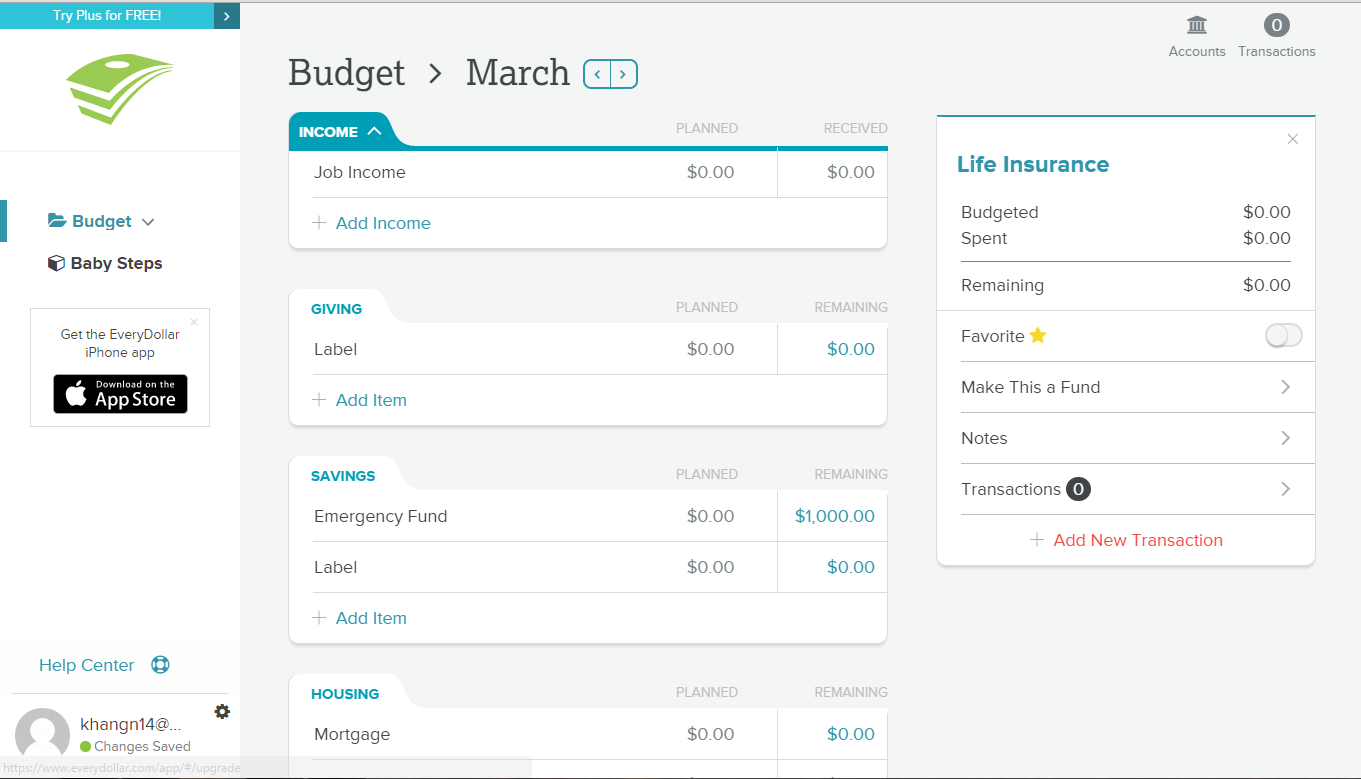 The initial step is to put in your monthly income and then move down the line to fill out all you budget items. A nice feature is that as you scroll down the screen, the amount that you have left to budget is locked at the top for you to see. You can also click on the remaining amount and that will toggle the website to switch to how much you’ve spent in your budget. This gets a little annoying because I thought I could change the spent amount by clicking it but I can only do that through the added transactions. Speaking of the transactions, this is where the budget tool fails miserably and makes it no better than a mediocre tool.
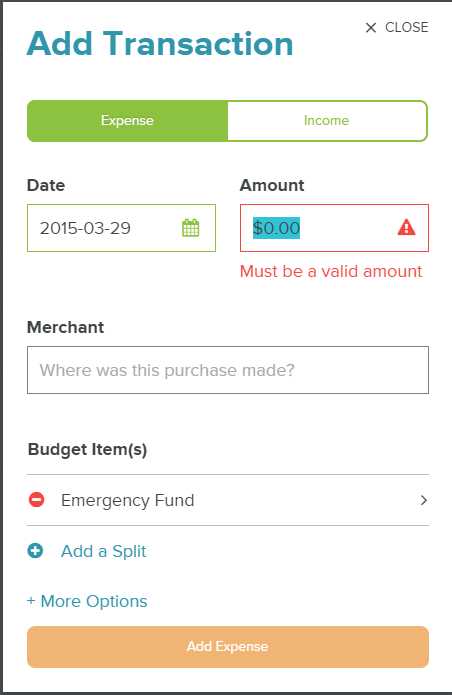